Old Photo Restoration Workflow for Family Archives

Pixelto Editorial Team
2/21/2026

Before you publish
Treat this article as workflow guidance, not automatic approval
Public content still needs factual review, channel review, and rights checks. Use the supporting documentation before shipping commercial assets.
Restoration goals before touching any pixels
When restoring historical photos, accuracy is more important than aggressive beautification.
Define your target first:
- Archival fidelity (minimal changes)
- Family sharing (clear but natural)
- Print preparation (larger size and tone balancing)
Step 1: assess damage type
Create a quick checklist:
- Physical scratches
- Dust and scanning artifacts
- Faded contrast
- Color cast (for colorized scans)
- Missing corners
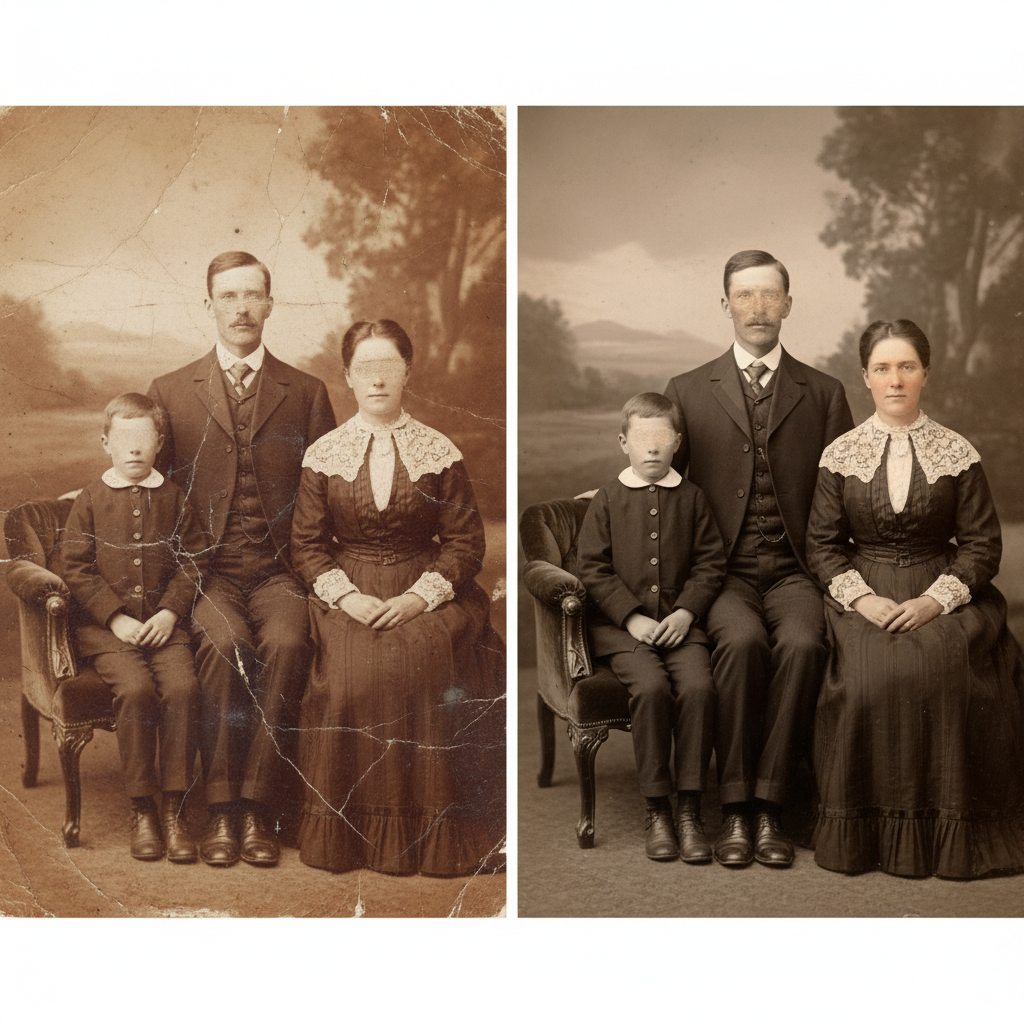
Step 2: run restoration in stages
Do not apply everything at once.
- Structure repair: remove scratches and tears.
- Contrast recovery: recover dynamic range.
- Optional colorization: add color only after structural cleanup.
Step 3: verify historical plausibility
For colorized output:
- Avoid neon saturation
- Keep skin tones realistic
- Preserve clothing material realism
Step 4: export archival and social versions
- Archive master: high-quality PNG/WebP with minimal compression.
- Social share: optimized version with consistent size.
Common mistakes
Over-smoothing faces
Fix by reducing enhancement strength and preserving original texture.
Artificial skin tones after colorization
Use neutral tone constraints and validate with family references when available.
Background artifacts after heavy repair
Run a second pass only on affected zones with stricter change boundaries.
Compliance notes
Do not edit historical photos to misrepresent identity or events.
If images contain private individuals, follow your jurisdiction's privacy and consent requirements.